Basic Operations

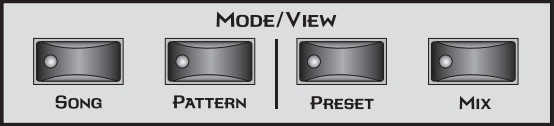
Mode/View Buttons
sftp://godstrut@a2ss46.a2hosting.com:7822/home/godstrut/unityconstruct.org/media/hardware/emu/px7/manual/emu.pxy.manual.03-basic-operatiions-05.jpg
LED View Select Section
Sequencer Controls
Stop Button Pressing the Stopbutton immediately stops any currently playing Pattern
Sequence or Song Sequence. The sequence remains at its current location.
Press the Playbutton to resume from the current location.
Press the Stopbutton when the sequence is stopped to return to the
beginning of the sequence (RTZ). Pressing the Stopbutton a third time
reloads the initial setup information for the Pattern or Song.
Play Button The Playbutton engages the transport, regardless of sequencer mode
(except in step edit). The LED in the button will be illuminated when the
sequence is running.
Pressing Playwhile in Recordmode puts the sequencer into Pausemode.
The sequencer stops and the Play LED flashes. Pressing Playagain resumes
Recordmode.
Record Button The Record button selects one of the three Pattern record modes or two
Song record modes.
Song Record modes (from Song mode)
• One press .............. Realtime record mode
• Two presses ........... Step record mode
Pattern Record modes(from Pattern mode)
• One press .............. Realtime record mode
• Two presses ........... Grid record mode
• Three presses ........ Step record mode
The LEDs to the right of the button indicate the record mode. After
selecting a record mode, the Play button LED will be flashing. Press Play to
begin recording.
You can press Record at any time during recording or playback to go in and
out of Realtime Record mode (i.e. Punch In & Out)
Tap Tempo The Tap Tempo button allows you to change the tempo at any time by
tapping the button at the desired tempo. Three taps are initially required to
change the tempo and then the tempo follows with each subsequent tap.
Edit Section
Song Edit Button The Song Edit menu allows you to name and edit songs. An illuminated
LED in the button indicates that you are in Song Edit mode. For more information about Songs and Song mode, see page 103. When pressed in combination with the Pattern Edit button, Song Edit puts the PX-7 in Demo
mode.
Pattern Edit Button The Pattern Edit menu allows you to name and edit patterns. An illuminated LED in the button indicates that you are in Pattern Edit mode. For
more information about Patterns and Pattern Editing, see page 52. When
pressed in combination with the Song Edit button, this button puts PX-7 in
Demo mode.
Preset Edit Button The Preset Edit menu allows you to create and edit presets. An illuminated
LED in the button indicates that you are in Preset Edit mode. For more
information about the Preset Edit menu, see page 199.
Global Button The Global menu contains parameters that affect the entire machine. An
illuminated LED in the button indicates that you are in the Global menu.
For more information about the Global menu, see page 145
Controllers Button The Controllers menu contains parameters that are related to the front
panel controller knob and button triggers. An illuminated LED in the
button indicates that you are in the Controllers menu. For more information about the Controllers menu, see page 133.
34 E-MU Systems
Basic Operations
Edit Section
Arpeggiator Button The Arpeggiator menu contains parameters that are related to the Master
Arpeggiator such as creating and editing arpeggiator patterns. An illuminated LED in the button indicates that you are in the Arpeggiator menu.
For more information about the Arpeggiator menu, see page 243
MIDI Button The MIDI menu contains parameters that are MIDI related. An illuminated
LED in the button indicates that you are in the MIDI menu. For more information about the MIDI menu, see page 159.
MIDI Panic Button Pressing the MIDI and Home/Enter buttons simultaneously sends a MIDI
“All Notes Off” and “All Sound Off” for all 32 MIDI channels.
Home/Enter Button The Home/Enter button is dual purpose. In general, this button acts as the
“Home” button. For example, when in an Edit menu, this button snaps the
cursor to the page name field of the current screen. When viewing the
Preset Select screen, this button snaps the cursor to the preset number field.
The flashing green LED of the Home/Enter button indicates that pressing
the button will initiate a particular operation.
Save/Copy Button The Save/Copy button is used to save changes to a pattern, song, preset,
copy data between presets, randomize presets and to move other types of
data. Selected groups of parameters, such as PatchCord settings, can be
copied between Presets and/or between Layers using this menu. The menu
is context-sensitive and will start at the appropriate save screen. See Save/
Copy on page 285 for more information.
The LED in the button illuminates to indicate that you are in the Save/
Copy menu. The LED also illuminates when any preset parameter has been
changed in the Edit menu (or if the front panel knobs have been moved
with Quick-Edit mode enabled).
Compare Button The Compare button allows you to toggle between an edited version of a
preset and the original, unedited version. When a preset has been edited,
an asterisk appears in the preset name field and the Save/Copy LED flashes.
Press the Compare button, lighting it’s LED, to hear the unedited preset.
Press the Compare button again to hear the edited preset. If edits are made
to the preset while listening to the compared original version, compare
mode is aborted and the compare LED goes off.
Audition Button When the Audition button is pressed, the LED next to the button will
illuminate and a short “Riff” (programmed as part of the preset) will play.
The Riff is latched on and plays continuously until the button is pressed
again. Presets can be changed while Audition is latched on. See “Bank Select
Commands” on page 196 for more information on selecting banks via MIDI.
PX-7 Owners Manual 35
Basic Operations
Real-time Controller Knobs
The top line of the Preset display changes to show the MIDI Bank Select
controller values needed to select the preset being auditioned. This handy
feature lets you know the exact Bank and Preset number
Real-time Controller Knobs
The Real-time Controller Knobs can serve several purposes. The first four
functions are selected using the Controller Function Selectbutton above
the realtime control knobs. Preset Quick Edit can be enabled to use the
knobs for editing in the Preset Edit menu.
1. Quick Edit- Real-time control of internal synthesizer parameters and
“Quick Editing” the initial settings of the real-time controllers
2. Programmable Knobs- Real-time control of MIDI continuous
controllers on external synthesizers
3. Volume- Setting the volume of 16 channels.
4. Pan- Setting the pan position of 16 channels
Trigger/Mute Buttons
Touchstrip, Transpose, Keypad
Preset Screen
Sound Navigator
- Log in to post comments